The rack your bike’s always wanted
Skill Level: Experienced
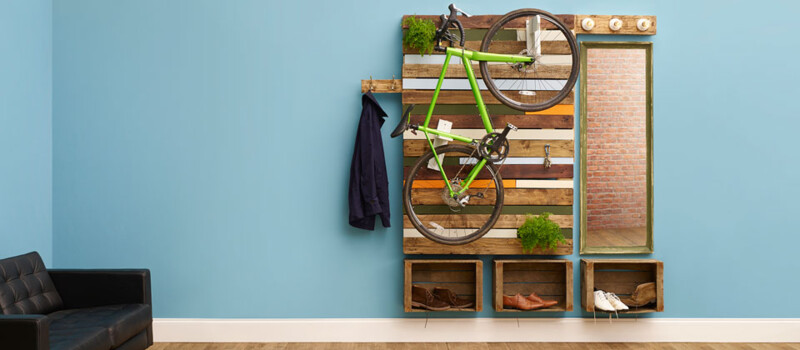
Create your own multi-purpose bike, shoe, and coat rack from old pallets.

Products You Will Need
Step by Step Instructions
Step 1. Secure the Pallets
Old pallets are often broken and need some reinforcement. Firstly create a 4mm pilot hole in the corner of the pallet using your drill. Then, drive long screws into the pallet to create a more stable frame.
Step 2. Prepare the Pallet Surfaces
Use your hammer to knock in any protruding nails to create a flat and safe pallet surface. Then use a sander to give your pallets a smooth, even finish. You can use varnish to provide a stained effect to your pallets.
Step 3. Create the Batons to Hang the Bike Rack
Measure out 8 lengths of 2x1 timber at a length of 30cm each. These batons will be used to create hooks to hang your bike rack on the wall. Each hook will consist of two batons, with two hooks holding the top pallet in place and the other two securing the bottom pallet on the wall.
Step 4. Cut the Batons
Mark out a pencil line and cut the timber to length using your jigsaw. Clamp the timber securely in place on your workbench using a trigger clamp.


Step 5. Find the Perfect Position for Your Bike Rack
Using your tape measure and a pencil, measure from the floor to the position of the top of your higher pallet. When marking the position for the brackets, allow for the width of the top strip of the pallet.
Step 6. Prepare to Drill
Switch your drill driver to hammer drilling mode.
The hole positions for the bracket batons use to secure the highest pallet must be perfectly aligned with each other to ensure the pallet sits straight on the wall. Use your tape measure and a spirit level when marking these positions. Once these positions are marked, switch your drill driver to hammer mode and drill holes into the wall. These holes will be used to fix the batons into place.
Step 7. Wall Plugs
Insert a wall plug into each hole using a hammer. This will provide strength to the holes and wall when hanging your bike rack.
Step 8. Secure the Batons to the Wall
Use your drill driver and screws to secure the first batons to the wall. These help to create the hooks for the higher pallet. Once you’ve positioned this pallet, you can measure up to position the lower pallet. Use a spirit level to make sure that they’re perfectly aligned before you begin to use your drill.


Step 9. Turn the Batons Into Your Pallet Hooks
Now it’s time to add batons to the two already fixed to the wall to create the hooks for your higher pallet. Position each baton as shown, to create a hook effect. Use your drill to secure the secondary batons into place and repeat for the adjacent baton.
Step 10. Hang the First Pallet to Position the Second
Hang the first pallet on the wall and measure where the lower pallet will need to sit. Allow for 50mm of space between the two pallets. Once you’ve added 4 remaining batons to create the hooks for the lower pallet, you’ll need to join two pallets together to add strength. Using timber from your spare pallet, cut 2 lengths of 300mm, insert vertically between the two pallets, and join them together with your drill driver and screws.
Step 11. Start Creating the Brackets for Your Bike Rack
Using your circular saw, cut timber from your spare pallet to approximately 10cm longer than the width of your bike’s handle bars. You’ll need to cut 6 of these lengths in total.
Step 12. Make the Top Wheel Bracket
Screw these pallets off cuts together into a simple bracket, creating a T-bar shape for the part that will fix the pallet. Ensure that all screws are secure. Using your jigsaw, remove sharp corners and cut a notch in one of the brackets approximately 8mm from the end, for your bike wheel to sit in securely.


Step 13. Get Sanding
Smooth the edges of your brackets using your detail sander.
Step 14. Create the Second Bike Hook
For the second hook for your bike’s frame, the timber will need to run horizontally when fixed into place, so that your bike’s saddle post will rest on top of it. Ensure all screws are securely fixed into place using your drill driver.
Step 15. Smooth the Edges
As with the first bike rack bracket, use your sander to ensure that the edges are smooth.
Step 16. Time to Create the Infill Panels for Your Pallets
Measure the gaps between the pallet strips using your tape measure. You’ll use this measurement to cut the infill strips to the correct size.


Step 17. Get Your Saw Ready to Cut
When cutting your infill strips, it helps to have a straight edge guide to follow. Measure the distance from the cutting blade to the edge of the base plate on your circular saw.
Step 18. Almost Ready to Cut
Add this measurement to that of the gaps between the pallet panels, and mark at several points along with timber you will be cutting with your circular saw.
Step 19. Cut the Infill Panels
Clamp a piece of guide timber to your plywood board to align with the cutting marks you have just created. Set the cutting depth of your circular saw to a little more than the thickness of the board and start cutting your infill panels.
Step 20. Add a Bit of Colour
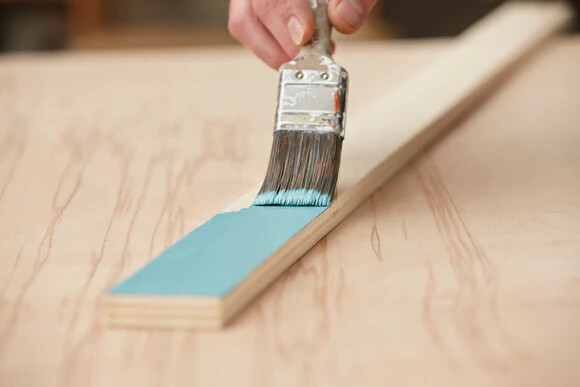
Paint the infill panels in a colour of your choice. Screw the infill panels to your pallet. If you’d like, you could leave a few gaps so that pot plants can be used to add a bit more colour to your bike rack. Once your infill panels have been attached to the pallets, measure up where your bike wheel and frame brackets will need to sit. Once you’re happy with the angle, attach the brackets in a position to support the bike.


Step 21. Create a Panel for your Lighting
Measure timber and cut 3 pieces to the width of your mirror plus approximately 20cm. These will be used to create the housing for the lighting that will sit above the mirror.
Step 22. Make Holes for the Lights
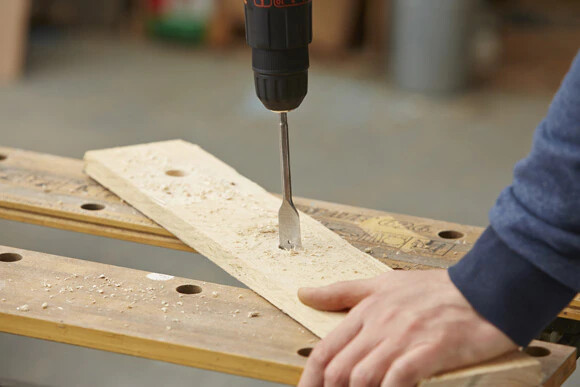
Using your drill driver and a 20mm spade bit, create three evenly spaced holes for the lighting to pull through. Drill these holes just above the centre of the timber panel.
Step 23. Wiring Your Lights
You’ll need an experienced electrician for this to ensure a safe set up. Our lighting panel used three standard light fittings. Attach the two other pieces of timber cut for your lighting housing above and below the light fittings.
Step 24. Add a Bracket to the Side of the Lighting Housing
Measure, cut, and attach a longer piece of timber to the side of the lighting housing. This will be used to attach the lighting to the side of your pallet bike rack. Once secure, attach the lighting to the side of your pallets using your drill driver and screws.


Step 25. Create Holes in the Wall for the Wine Crates
With the main pallets now attached to the wall, measure where you’d like the wine crates to sit, switch your drill to hammer mode, and start drilling.
Step 26. Fix the Wine Crates
Screw each wine crate to the wall in two places to ensure they are secure and stable. Use a spirit level to ensure they sit straight beneath the pallets.
Step 27. Add the Finishing Touches and You’re Done
Why not add another piece of pallet timber and some hooks to hang your favourite jackets? Hang the mirror on the wall underneath the lights and add your bike, coats, shoes, and plants. You now have a multi-purpose space saving rack with a difference.


